
In 2012, Barack Rosenshine published the Principles of Instruction: a set of 10 research-based principles of instruction, along with suggestions for classroom practice. The principles come from three sources: (a) research in cognitive scienceThe study of the human mind, such as the processes of thought, memory, attention and perception, (b) research on master teachers, and (c) research on cognitive supports.
The 10 Principles of Instruction are as follows:
- Principle 1: Begin a lesson with a short review of previous learning: Daily review can strengthen previous learning and can lead to fluent recall.
- Principle 2. Present new material in small steps with student practice after each step. Only present small amounts of new material at any time, and then assist students as they practice this material.
- Principle 3. Ask a large number of questions and check the responses of all students: Questions help students practice new information and connect new material to their prior learning.
- Principle 4. Provide models: Providing students with models and worked examples can help them learn to solve problems faster.
- Principle 5. Guide student practice: Successful teachers spend more time guiding students’ practice of new material.
- Principle 6. Check for student understanding: Checking for student understanding at each point can help students learn the material with fewer errors.
- Principle 7. Obtain a high success rate: It is important for students to achieve a high success rate during classroom instruction.
- Principle 8. Provide scaffolds for difficult tasks: The teacher provides students with
temporary supports and scaffolds to assist them when they learn difficult tasks. - Principle 9. Require and monitor independent practice: Students need extensive, successful, independent practice in order for skills and knowledge to become automatic.
- Principle 10. Engage students in weekly and monthly review: Students need to be involved in extensive practice in order to develop well-connected and automatic knowledge.
On this page, we have gathered a collection of guides for how the principles might be applied to MFL. The guides have been written by Rebecca Nobes, Head of Spanish, The Boswells School, UK.
This content was originally produced as part of the Accelerate programme, a Department for Education-funded early career teacher programme designed and delivered by Education Development Trust with the Chartered College of Teaching. It is used here with kind permission of Education Development Trust.
Principle 1: Begin a lesson with a short review of previous learning: Daily review can strengthen previous learning and can lead to fluent recall.
When learning a modern language, there are a number of grammatical concepts that students need to get to grips with, to the point of automaticity, in order to learn more complex grammatical structures. For example, without a solid understanding of the conjugation of regular present tense verbs, students are unlikely to grasp the irregulars or other tenses. What’s more, without an understanding of these basic ‘building blocks’, students are limited in the language that they will be able to understand and produce themselves in future.
It’s easy to get frustrated when a class has seemingly forgotten everything you taught them ‘only last week!’ or that they should ‘remember from year 7!’ A problem that we face as teachers, is that methods that may seem to rapidly increase student performance in a lesson fail to support long term retention of that knowledge (Bjork and Kroll 2015). For this reason, it is advisable to incorporate what Bjork (1994) coined as ‘desirable difficulties’ into your teaching. It might seem at the time as if students are not performing as well, but in fact, that which students find easy is not always what is best for their learning. This may explain why students frequently use study skills which are ineffective (Dunlosky 2013), because they find them easy and make them feel more confident in the moment. However, when aiming for long term retention of knowledge, a little struggle is actually for the best.
As teachers there are a number of ways in which we can help to combat this forgetting, and a review of previous learning at the start of each lesson is one of them. Reviewing learning from previous lessons can be done in a number of ways, so you don’t have to feel as if you are doing the same thing at the start of every lesson. Although, whilst that may seem boring to you, it would soon become part of routine and be a good way of getting students settled at the start of every lesson.
The most important thing about this review is that it is encouraging students to think, as ‘memory is the residue of thought’ (Willingham, 2010). So just reading over notes or reteaching a concept is not what is meant by a ‘short review’ in this context. The first consideration when planning is to decide what knowledge you need students to re-activate in order to get the most from the lesson you are teaching. For example, if you are teaching the near future tense in Spanish/French, you may wish to use the review to remind students what they know about the present tense of the verb ir/aller. There are a number of ways you may wish to do this:
- Brain ‘dump’: ask students to write everything they can remember about the verb ir/aller without looking at their notes. You may wish to provide some more structure as for some students this will potentially be too vague and they will struggle too much for the exercise to be beneficial.
- Match up: provide the target language and the English, students need to match up the two sides. Whilst this isn’t requiring students to be able to conjugate the verbs themselves, they still need to remember the patterns to match them up.
- Fill in the blanks: provide a table with the whole verb paradigm for ir/aller in the present tense. Remove some of the content and ask students to fill it back in. Easily differentiated by how many gaps you leave.
- Thinking quilt: an idea found on Twitter from @KKNTeachLearn and adapted for MFL by @morganMFL.
Create a table like the below with the whole present tense paradigm of the verb aller mixed with one or more other verbs. Students need to highlight the verb aller in one colour and the others in another. Depending on the level of the students and the content to be learned in the lesson you could also include multiple other verbs to be highlighted in different colours. Expect students to translate all or some of the verbs or write sentences using the verbs.
| Je vais | Ils vont | Tu es | Elle va |
| Ils sont | Nous sommes | Tu vas | Vous êtes |
| Il est | Nous allons | Elles sont | Elle est |
| Il va | Je suis | Ells vont | Vous allez |
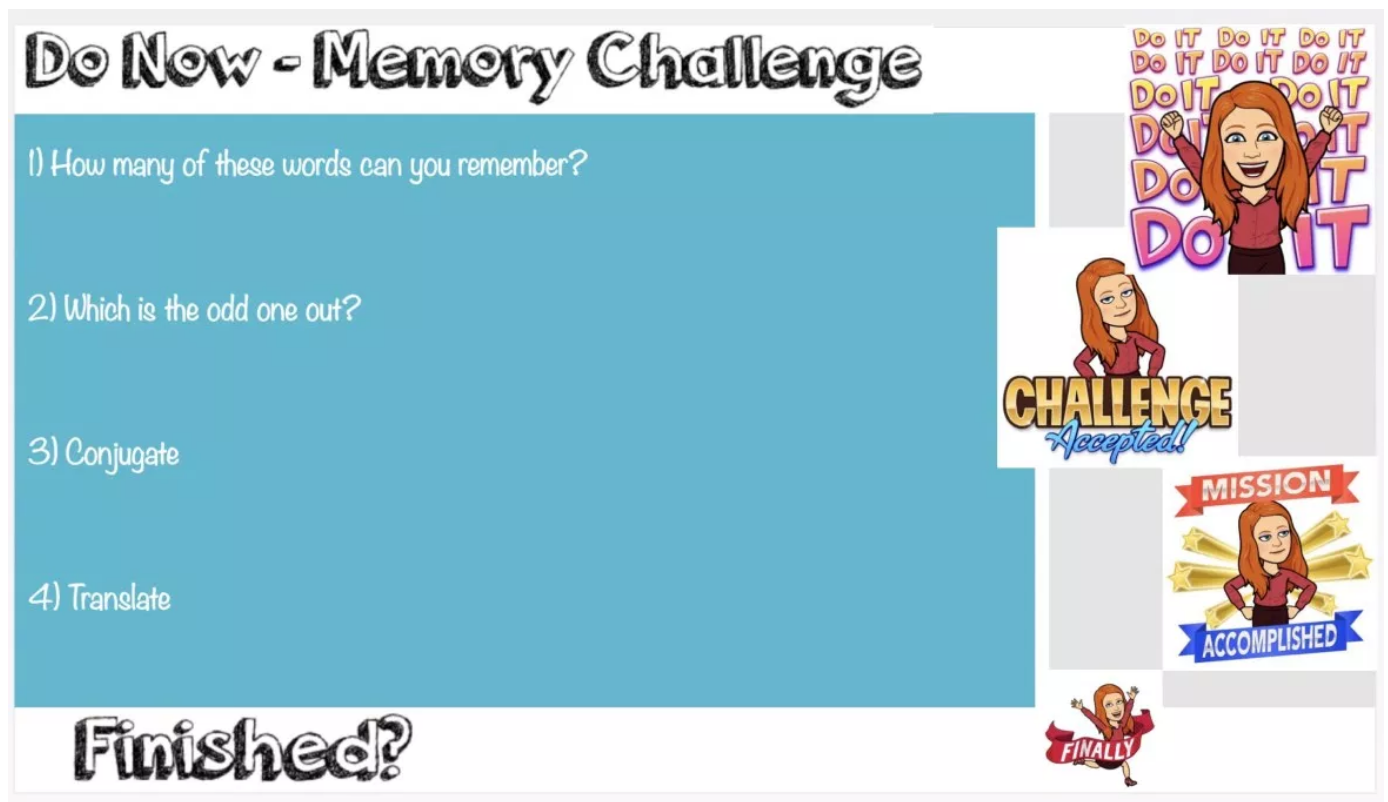
- A memory challenge task such as the one below can be used to get students not only to recognise the language they will need in the lesson but also work on how to form it.
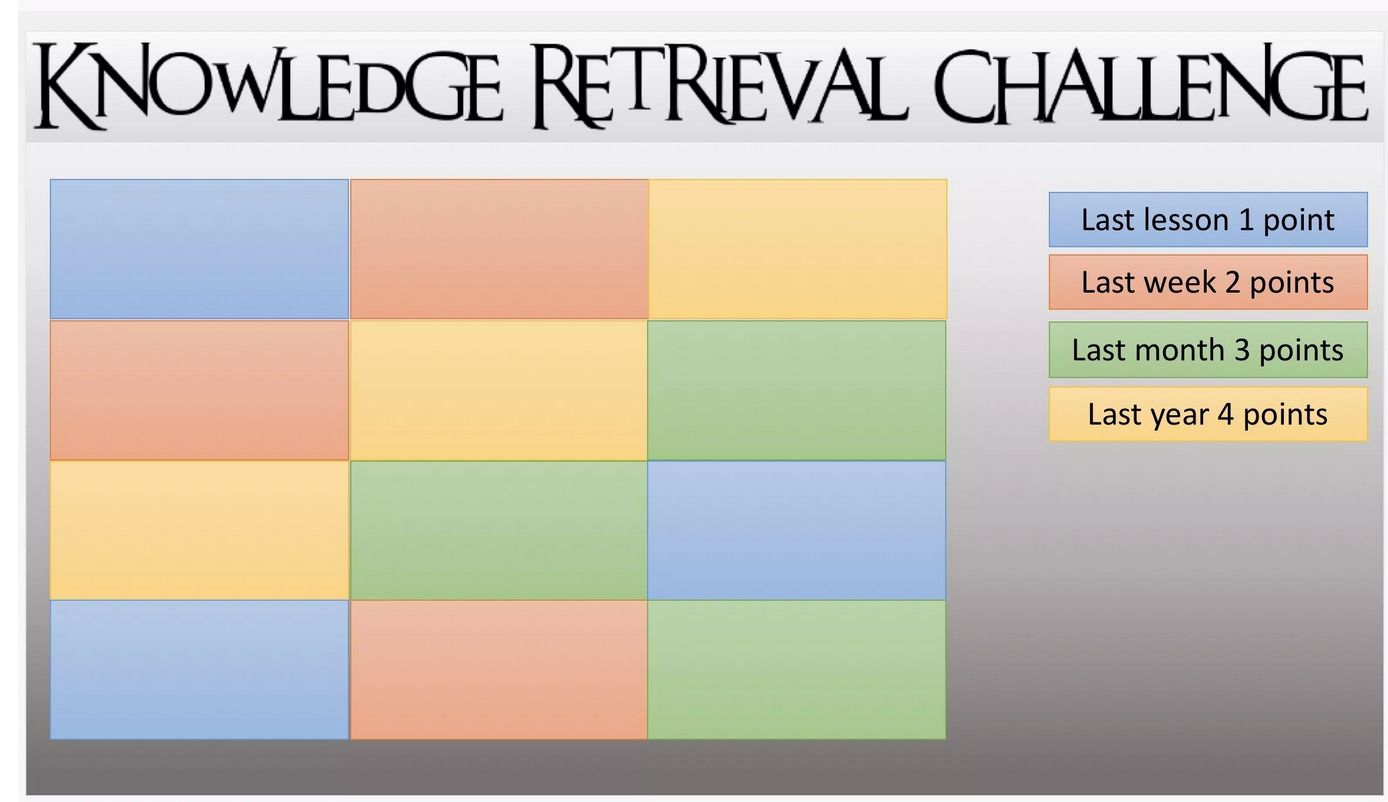
- Knowledge retrieval tasks such as the below can be used to combine the knowledge you need students to reactivate (aller/ir) with other useful vocabulary that they have studied in the past. Students tend to enjoy the competitive element, especially if you can combine this with your school reward system.
The above activities are just a few examples of the ways that you can review previous knowledge at the start of a lesson. The key is getting students to think about the knowledge that you need them to remember. Templates above, and more can be downloaded from: http://learninglinguist.co.uk/mfl-starters-incorporating-retrieval-practice/
References
Bjork R (1994) Memory and metamemory considerations in the training of human beings. In: Metcalfe J and Shimamura A (Ed.) Metacognition: Knowing about Knowing, pp. 185–205. Cambridge, MA: MIT Press.
Bjork RA, Dunlosky J and Kornell N (2013) Self-Regulated Learning: Beliefs, Techniques, and Illusions. Annual Review of Psychology 64(1): 417–444. Available at: http://www.excaliburtsa.org.uk/wp-content/uploads/2017/11/Self-regulated-learning-Bjork.pdf (accessed 12 April 2019).
Bjork RA and Kroll JF (2015) Desirable Difficulties in Vocabulary Learning. The American Journal of Psychology 128(2): 241–252. Available at: https://www.jstor.org/stable/10.5406/amerjpsyc.128.2.0241 (accessed 12 April 2019).
Dunlosky J (2013) Strengthening the Student Toolbox: Study Strategies to Boost Learning. American Educator 37(3): 12–21. Available at: https://www.aft.org/sites/default/files/periodicals/dunlosky.pdf (accessed 12 April 2019).
Rosenshine B (2012) Principles of Instruction: Research-Based Strategies That All Teachers Should Know. American Educator 36(1): 12–19/39. Available at: https://www.aft.org/sites/default/files/periodicals/Rosenshine.pdf (accessed 12 April 2019).
Willingham D T (2010) Why don’t students like school? : a cognitive scientist answers questions about how the mind works and what it means for the classroom. San Francisco, Ca: Jossey-Bass.
Principle 2. Present new material in small steps with student practice after each step. Only present small amounts of new material at any time, and then assist students as they practice this material.
Rosenshine’s second principle states that new material should be presented in small steps, with plenty of student practice between each. This is because too much new information can overload the working memory and significantly reduce the amount of learning that is able to take place. To deal with the limitations of the working memory we can work through new processes one step at a time, practising each one until it is mastered. As teachers it is important that we give multiple examples, spend lots of time modelling and explaining and check student understanding at every point (Rosenshine, 2012).
A demonstration of this in practice is a model of input and application (Enser, 2018) of practising each step with your students until you are sure that all the ‘building blocks’ are in place as opposed to using the much less effective discovery learningAllowing learners to discover key ideas or concepts for themselves, where students are given a longer task and expected to learn the steps for themselves (Clark et al., 2012).
According to Kirchner et al. (2006) direct instructionA method of instruction in which concepts or skills are taught using explicit teaching techniques, such as demonstrations or lectures, and are practised until fully understood by each student involving plenty of guidance and examples leads to much more learning than the discovery method as free exploration of something complex could generate a high load on working memory which will be detrimental to learning. This is particularly important when we consider that the students we teach are novices and have not yet developed the schema into which this new knowledge that we are teaching them will fit (Sweller et al., 2011).
A final point on cognitive load before looking at MFL-specific examples is that we must not only be careful about the amount of information we are presenting to students at one time, but about the way in which we are presenting it. For example, if using slides, consider:
- Are they clear of unnecessary pictures?
- Do they only include the text that is needed to understand the concept?
- Are we requiring students to split their attention between two things, whether they are spaced in time or location?
- Are we asking students to listen as well as to read?
- Are we presenting transient information that is lost as soon as it is said and not backed up with external offloads such as written notes?
All of these considerations are very important, especially when we are presenting students with new learning such as a grammar concept.
Take for example constructing an opinion with a comparative in Spanish or French:
Me gustan las patatas fritas porque son más sabrosas que los plátanos.
J’aime les frites parce qu’elles sont plus savoureuses que les bananes.
There are a number of parts that a student must understand individually in order to form the whole. Firstly, students need to have a clear understanding of nouns and articles. They need to understand gender and number and how this affects the language. Following this, in Spanish students need to understand the difference between gusta and gustan. In French, students need to understand why parce que + elles becomes parce qu’elles. Next, they need to understand the verbs ser/être and adjective agreement. Finally, they can then form the comparative.
Presenting all this information to students at once would be overwhelming and would be unlikely to lead to the desired learning. Instead, we present the information in smaller chunks, ensuring students understand at every step of the way.
We can do this in various ways, perhaps starting with some activities on mini whiteboards translating some opinions. We could then work with multiple choice questions to check student understanding of adjective agreement, tools such as Plickers are useful for instantly catching and addressing misconceptions. Once these initial concepts are understood, we can move onto modelling how to form a comparative, giving plenty of different examples and questioning students to check understanding. Remember in principle one we discussed the limitations of our memory? Even if students appear to have mastered this at the end of the lesson it is going to need revisiting a number of times before it becomes part of their long-term memory.
Another area where it is useful to introduce new information in steps is tackling certain types of exam question. For example, at GCSE students are expected to describe a photograph in the speaking exam. To begin with, students are often unsure of what is expected of them and may just list items in the picture. Many teachers choose to use some sort of structure, for example PALM W OJ (People, action, location, mood, weather, opinion, justification) to help students to form their answers.
When first introducing this, the cognitive load would be too great for some students if they were just told to do all elements at once. To ease the cognitive load, you could work on the people element first, ensuring students understood any grammatical structures needed and applying them to different photos before moving onto action, location etc. When students are confident with each of these elements separately they can be built up to form the whole description.
There are many more instances where working in smaller chunks is desirable, but these begin to overlap with principles five and eight so will be discussed in more detail later.
References
Clark RE et al. (2012) Putting Students on the Path to Learning: The Case for Fully Guided Instruction. American Educator 36(1): 6–11.
Enser M (2018) Putting Theory into Practice. Heathfield Teach Share Blog, 23. Available at: heathfieldteachshare.wordpress.com/2018/04/23/putting-theory-into-practice/ (accessed 15 April 2019).
Kirschner PA et al. (2006) Why Minimal Guidance During Instruction Does Not Work: An Analysis of the Failure of Constructivist, Discovery, Problem-Based, Experiential, and Inquiry-Based Teaching. Educational Psychologist 41(2):75–86. Available at: https://www.researchgate.net/publication/27699659_Why_Minimal_Guidance_During_Instruction_Does_Not_Work_An_Analysis_of_the_Failure_of_Constructivist_Discovery_Problem-Based_Experiential_and_Inquiry-Based_Teaching (accessed 8 October 2019)
Rosenshine B (2012) Principles of Instruction: Research-Based Strategies That All Teachers Should Know. American Educator 36(1): 12–19/39.
Sweller J et al. (2011) Cognitive Load TheoryAbbreviated to CLT, the idea that working memory is limited and that overloading it can have a negative impact on learning, and that instruction should be designed to take this into account. New York: Springer Science+Business Media.
Principle 3. Ask a large number of questions and check the responses of all students: Questions help students practice new information and connect new material to their prior learning.
Despite the beliefs of some that teachers must limit the amount of time they spend talking in the classroom, Rosenshine (2012) found that the most successful teachers spent more than half of the lesson time lecturing, demonstrating and asking questions. In fact, from a language learning perspective this makes perfect sense. Where are students going to hear the language being modelled well if it’s not by you? Questioning in MFL is very different to other subjects as, other than when explicitly teaching grammar, we are not often asking students about concepts, we are encouraging them to use and practice the language.
Considering the above, the questioning in MFL lessons falls into two categories: checking for understanding of structures and rules, and checking ability to manipulate and use language.
The first category is where MFL is most similar to other subject areas, this is where we should be asking as many questions as we can to different students, asking for greater levels of depth and ensuring that all misconceptions are addressed. It is also important to establish how students reached their answers (Sherrington, 2018). An example of this sort of exchange could be as follows:
Teacher: How do you say science is fun?
Student 1: Las ciencias son divertidas
Teacher: Good, why does divertidas end in as?
Student 2: Because it’s feminine and plural.
Teacher: Who can explain that answer?
Student 3: Las ciencias is feminine and plural.
Teacher: How do you know?
Student 3: Because of the las.
Teacher: Good. So why do we use son? Shouldn’t it be es?
Student 4: No, es means it is but son is plural.
Teacher: Good, thank you. What would be different if we were describing PE instead?
Student 5: It would be divertida because it’s feminine and singular.
Teacher: Perfect, what about English?
Student 6: Divertido because it’s masculine and singular.
These kinds of questions are important for clarifying student understanding of the processes behind manipulating language. After a questioning sequence such as the above, you could use multiple choice questions to ensure all students understand.
There are a number of tools you can use to make sure that all students are responding, and to gauge levels of understanding. For instant feedback and the opportunity to immediately address misconceptions, Plickers is a very useful tool involving students holding up a card with a unique QR code assigned to them which is scanned by the teacher using their mobile phone. The benefit is that students cannot copy one another as they cannot see what they are responding and their answers can stay anonymous to ensure the questioning is low stakes.
When students have their own devices to use, tools such as Gimkit, Quizizz and Kahoot are great for engaging students in answering a large amount of questions without realising it. This has the double benefit of them practising for an extended period of time and also allows you to download the scores to check where the misconceptions occurred. These questions, as with all multiple-choice questions, must be very carefully written to ensure that there is a good level of plausibility for each option so that students need to think carefully about the answer. After all, as mentioned in the discussion of principle one, ‘memory is the residue of thought’ (Willingham, 2010).
Without the use of technology there are still a number of ways to ensure that you ask a large number of questions to as many students as possible. Rosenshine (2012) suggests students tell the answer to a neighbour, raise their hands if they know the answer or if they agree with the answer that has just been given.
In Teach Like A Champion, Doug Lemov (2015) suggests a variety of ways for doing this including Wait Time, another useful technique where the teacher narrates the hands that are going up, prompts thinking skills such as ‘I can see some of you looking back in your book, well done’ or ‘There are lots of people making notes, good work’ and most importantly giving students silent thinking time where you are not talking. This should lead to more hands up and give all students the chance to reach the answer before someone has said it aloud.
Of course, another purpose of questioning in MFL is to practice the language. Questions designed for practising language can seem artificial, but this isn’t necessarily an issue (Smith, 2018). Pedagogically speaking, the lack of information gap isn’t a problem as students are being given the opportunity to hear language modelled and to easily respond (Smith and Conti 2016). There is a hierarchy of questions that teachers can circle to encourage more complex responses:
- True/False
- Yes/No
- Either/Or
- Multiple options
- Question word (Smith, 2018).
The language needed to respond to these questions increases in complexity and works best when planned in advance.
Time constraints during lessons might mean it is hard to check on the language production of all students. You might consider trying a tool like Socrative which allows all students to respond to open answer questions that you can quickly view and pick out misconceptions. Indeed, this could also be done with mini whiteboards, except these responses are quickly lost and with longer responses it is harder to check them all.
References
Lemov D (2015) Teach like a Champion 2.0: 62 Techniques That Put Students on the Path to College. New York: John Wiley & Sons.
Rosenshine B(2012) Principles of Instruction: Research-Based Strategies That All Teachers Should Know. American Educator 36(1): 12–19/39.
Sherrington T (2019) Exploring Barak Rosenshine’s Seminal Principles of Instruction: Why It Is THE Must-Read for All Teachers. Teacherhead. Available at: teacherhead.com/2018/06/10/exploring-barak-rosenshines-seminal-principles-of-instruction-why-it-is-the-must-read-for-all-teachers/ (accessed 16 April 2019).
Smith S (2018) Becoming an Outstanding Languages Teacher. Abingdon: Routledge.
Smith S and Conti G (2016) The Language Teacher Toolkit. Scotts Valley, CA: CreateSpace.
Willingham DT (2010) Why Don’t Students like School?: A Cognitive Scientist Answers Questions about How the Mind Works and What It Means for the Classroom. San Francisco, Ca: Jossey-Bass.
Principle 4. Provide models: Providing students with models and worked examples can help them learn to solve problems faster.
Rosenshine’s fourth principle advises the use of models, worked examples and teacher thinking out loud to help students solve problems faster for themselves (Rosenshine, 2012). In MFL, there are a number of different problems that our students might need to solve, from conjugating a verb to constructing an opinion, translating a text to answering a reading comprehension question.
The key to this is that we want to reduce the cognitive load our students are facing (Sweller et al., 2011), to make it easier for them to take on the information that we need them to.
It is important to consider what we are modelling to students, as it will only be effective if students have access to the relevant knowledge (Quigley et al., 2017). For example, it would be of little use to model a translation if it was full of vocabulary or grammatical structures that students had never seen. As long as it is pitched correctly, though, modelling is an important tool, as we need to make certain processes explicit to our students in order to support them to get better (Quigley et al., 2017). In doing this, students can become more automatic at certain processes and free up their working memory to think about the linguistic elements needed, rather than the other process surrounding the task.
There are different ways we can model or supply worked examples in MFL, depending on what we are teaching our students.
Let’s take translation as an example. In this case using a visualiser is particularly helpful for modelling. Rather than just telling our students that we want them to annotate the text, we can use the visualiser to show them, step by step what to do and explain our thought processes. Without this explanation our students are likely just to jump straight into the translation in front of them, without careful consideration of the structure of the text or the grammar and vocabulary knowledge they will need. At A Level, this may mean that students miss structures which trigger the subjunctive as they haven’t taken a step back and really considered the text. Below is just one possible way of approaching modelling a translation task.


Providing models is also useful for writing tasks. For example, we can provide a GCSE-style task with bullet points explaining what must be covered in the response. Alongside the task we can also provide a model answer. Rather than provide a completed version, we could create this with the class. Discussing the bullet points, demonstrating the planning process and how we ensure we cover all parts of the mark scheme are all important processes for our students to understand. Once they have had this demonstrated to them, you may show them another example and ask them to explain how it was written, before then planning and writing their own response to a similar question.
Models and worked examples are not only useful for producing written and spoken language, but also for answering comprehension questions based on text or speech. Teachers can model processes for finding answers in a text to help students tackle these questions themselves in exam conditions. Again, a visualiser is particularly useful in this situation. Teachers can show students how they would approach identifying exactly what a question requires of them, and the process of how to find that answer in a text before asking students to complete a similar task for themselves using the processes demonstrated in the example.
On a simpler level when teaching a new grammar concept, be that as simple as a verb conjugation or something more complex like forming a comparative, teacher modelling can be very useful. In the same way as with the more complex tasks discussed above, internalising the processes that the teacher uses to complete a task is really beneficial for students, as they can follow those steps for themselves, focusing more on the language than the process. When modelling in this way, teachers can use the ‘I do, we do, you do’ method. First demonstrating themselves (I do), secondly completing problems with students (we do) and finally with students completing the problems for themselves (you do).
For example:
Modelling a new grammar concept:
| I do |
|
| We do |
|
| You do |
|
| Review |
|
No matter the complexity of the task at hand, modelling the processes involved will allow our students more working memory for focusing on the language rather than the process of completing the task. This can be useful at all levels, but especially with more complex exam tasks where there are a number of elements to consider when it comes to achieving the highest marks.
References
Quigley A, Muijs D and Stringer E (2018) METACOGNITION AND SELF-REGULATED LEARNING Guidance Report. Available at: https://educationendowmentfoundation.org.uk/public/files/Publications/Metacognition/EEF_Metacognition_and_self-regulated_learning.pdf (accessed 8 October 2019).
Rosenshine B (2012) Principles of Instruction: Research-Based Strategies That All Teachers Should Know. American Educator 36(1): 12–19/39 . Available at: https://www.aft.org/sites/default/files/periodicals/Rosenshine.pdf (accessed 12 April 2019).
Sweller J, Ayres P and Slava Kalyuga (2011) Cognitive Load Theory. New York, Ny: Springer New York.
Twitter.com. (n.d.). Adam Lamb (@senorcordero) | Twitter.Available at: https://twitter.com/senorcordero?s=1 (accessed 27 May 2019).
Principle 5. Guide student practice: Successful teachers spend more time guiding students’ practice of new material.
Rosenshine’s fifth principle, guiding students’ practice of new material, sits between modelling and independent practice. In guided practice students will need the processes that have been modelled previously and won’t be completely ready to practice without being led by the teacher. At this stage students will need close supervision and lots of feedback (Sherrington, 2019).
In MFL teaching, guided practice could come at the point at which students are practicing forming a certain grammatical structure in isolation to any other language. In this instance, students are only needing to think about that particular structure and aren’t using up vital working memory thinking about anything else. Guided practice is also useful for practicing reading and listening comprehension exercises. In an ideal world, we would be able to guide student writing and speaking practice too, but in reality, giving close supervision to each student in an average sized class would be a challenge. This is something that would be more achievable in perhaps an A level class, or small GCSE group.
Some ideas for guided practice in MFL are as follows:
Mini-whiteboards
One of the simplest ways to guide student practice is to use mini-whiteboards, so long as you have access to a set. This gives you the opportunity to make sure that all students are practicing exactly what they need to, following the steps you have shown them and reaching the right answer. For example, modelling a new grammar point and then asking students to manipulate the language for themselves. This way, students are still having time to think for themselves and come up with their responses, but they are not being left to do it totally alone and you can quickly check the whole class.
Successful use of mini whiteboards:
- Have routines for giving out the equipment, writing, raising and wiping the boards.
- Clear expectations and instructions.
- High expectations of student behaviour to avoid time wasting.
Example activity:
- Explain and model the new grammar point.
- Explain exactly what students are expected to do on their whiteboard. Model this at least once.
- Set the class their first question.
- Wait, countdown and instruct students to raise their boards.
- Pick out a number of boards, some incorrect and one correct.
- Ask a student to explain the errors.
- Ask a student to explain which is correct and why.
You may choose to do something other than picking out a selection of boards. Maybe giving hints to those with correct answers or stopping and modelling the grammar point again if many are incorrect.
Tech alternatives
There are, of course, technological alternatives to using mini whiteboards, depending on what you are practicing. Some of these have been previously discussed in this series, going to show that the same tool can be useful for multiple purposes.
| Name of tool | Key points | MFL-specific |
| Plickers |
|
|
| Socrative |
|
|
| Nearpod |
|
|
Written Questions
Of course, most of what has been discussed above in relation to technology could be achieved via carefully written questions on a worksheet or whiteboard. These could be marked by a teacher circulating the room giving immediate feedback or as a self-/peer-marking exercise with discussion of the responses. It all comes down to your preference as a teacher.
So long as students are given the chance to practice in a structured way, be that on a sheet, whiteboard or using some other tool, the choice is up to the teacher and what works well for them and their classes. The important thing is that students are given the opportunity to focus on the area that needs practice, without interference from other elements and with teacher feedback and supervision.
References
Rosenshine B (2012) Principles of Instruction: Research-Based Strategies That All Teachers Should Know. American Educator 36(1): 12–19/39. Available at: https://www.aft.org/sites/default/files/periodicals/Rosenshine.pdf (accessed 12 April 2019).
Sherrington T (2019) Exploring Barak Rosenshine’s seminal Principles of Instruction: Why it is THE must-read for all teachers. teacherhead. Available at: https://teacherhead.com/2018/06/10/exploring-barak-rosenshines-seminal-principles-of-instruction-why-it-is-the-must-read-for-all-teachers/ (accessed 8 October 2019).
Principle 6. Check for student understanding: Checking for student understanding at each point can help students learn the material with fewer errors.
Rosenshine’s sixth principle is to check for understanding. In fact, checking student understanding and acting upon this is part of the Teachers’ Standards (DfEDepartment for Education - a ministerial department responsible for children’s services and education in England, 2011), it’s something we are always expected to do and, in one way or another, tend to do instinctively.
However, too often checking student understanding has been reduced to a show of thumbs up/down, traffic lights and smiley/sad faces to reflect how students feel about their current level of understanding. Whilst this may give us an idea of our students’ level of confidence at a certain time, it does not let us know what they do and don’t understand or usefully inform our next steps.
When checking understanding, consider the following:
- What do I need to check?
- How am I going to check it accurately?
- What am I going to do with this information?
- When and how am I going to check this again?
What do I need to check?
As MFL teachers we should consider what it really means to check student understanding, especially what is unique about this in our subject. It all comes down to what it is we are hoping to measure; is it understanding of how to manipulate a particular grammar point in isolation? Or, is it the students’ ability to use that grammar concept in context? This is a matter of knowledge vs control (Conti, 2016). At different stages, either may be suitable. After introducing a new grammar concept, we may want to check that our students have the necessary level of knowledge about it in order to be able to manipulate it in isolation, but this is never going to be our end goal. We will always need to move on and find out if our students also have control over that linguistic structure and can integrate it into the language that they produce. What is important to ensure is that our students not only have a passive understanding of the language, but can also actively use it (NFER, 2017).
How am I going to check it accurately?
After we have decided if we are checking for knowledge of the language or control of it, we need to consider how we are going to go about checking. This of course will depend on our purpose. If we are checking understanding to inform our next steps in a given lesson then the tool we use to assess students may be quite different to what we might use if we want to check their understanding at the end of a unit.
If the test resembles the work you would usually do in class, then so much the better (Smith, 2018), this way we know that our students are used to the format and understand the expectations, there is nothing extra to contend with. This can also only be a positive when it comes to considerations of cognitive load and working memory (Sweller, 2011), if students are only having to focus on the language at hand as opposed to understanding a new type of task.
If we want to check that our students have understood the mechanics of a particular grammar point, some multiple-choice questions might be just what we need. However to make an accurate judgement of students’ understanding, a few more tasks would be useful. They would certainly check understanding much more accurately than a thumbs up/down check.
Some considerations:
- Include enough multiple-choice questions to allow students to demonstrate that they can follow the steps we have shown them to reach the correct answer.
- Further extend students by asking them to complete some translations using that structure.
- Finally, elicit a written or spoken response that will include the grammatical structure that we have just taught.
What am I going to do with this information?
The most important part of checking student understanding is what you do with that information. Giving students timely feedback is essential but can contribute to workload pressures. Giving feedback doesn’t have to be the most onerous task. So, think about your next steps:
- A poor score on multiple choice questions could just require the correction of a simple misconception before answering another similar set of questions.
- Instead of marking and giving detailed feedback on a whole piece, you could focus on the grammar concept that has just been taught or use of specific phrases.
When am I going to check this again?
Once we have checked our students’ understanding, we need to remember that this really is only a snapshot of the current situation. Will students still have the same understanding a few days or weeks later? What about when they are under exam conditions? The other principles that we have discussed, or are yet to discuss, come into play here. Weekly and monthly review of this knowledge is necessary for making those long-term memories.
References
Conti G (2016a) Crucial issues in the assessment of speaking and writing (Part 1). The Language Gym. Available at: https://gianfrancoconti.wordpress.com/2015/08/10/ten-crucial-issues-in-the-assessment-of-speaking-and-writing-part-1/ (accessed 29 May 2019).
Conti G (2016b) Six very common flaws of foreign language assessment. The Language Gym. Available at: https://gianfrancoconti.wordpress.com/2015/08/19/six-common-flaws-of-foreign-language-assessment/ (accessed 29 May 2019).
Department for EducationThe ministerial department responsible for children’s services and education in England (DfE) (2011) Teachers’ Standards. GOV.UK. Available at: https://www.gov.uk/government/publications/teachers-standards (accessed 25 November 2020).
National Foundation for Educational Research (NFER) (2017) Refocusing Assessment modern foreign languages Refocusing Assessment -modern foreign languages. Available at: https://www.nfer.ac.uk/publications/GTGA01/mfl.pdf (accessed 29 May 2019).
Rosenshine B (2012) Principles of Instruction: Research-Based Strategies That All Teachers Should Know, by Barak Rosenshine; American Educator 36(1): 12–19/39. Available at: https://www.aft.org/sites/default/files/periodicals/Rosenshine.pdf (accessed 12 April 2019).
Smith S (2018) Becoming an outstanding languages teacher. London Routledge.
Sweller J, Ayres P and Slava Kalyuga (2011) Cognitive Load Theory. New York: Springer Science+Business Media.
Teachers’ Standards. (2011) Department for Education. Available at: https://assets.publishing.service.gov.uk/government/uploads/system/uploads/attachment_data/file/665522/Teachers_standard_information.pdf (accessed 12 June 2019).
Principle 7. Obtain a high success rate: It is important for students to achieve a high success rate during classroom instruction.
Rosenshine’s seventh principle encourages teachers to make sure that all students achieve a high success rate during practice. As many of these principles are, this would seem like common sense. That said, there are a number of complications related to this principle.
To my mind, the first issue here is to do with how we are defining success. In many other subjects I suppose this comes down to the number of correct answers a student can give. This can’t be applied in quite the same way to language learning. Yes, students can be given a score for a vocabulary or grammar test, but that’s one of the few situations where it can be quite so clear cut. The way we define success must of course come down to the intentions of the lesson, but there may be more to it than that.
If the aim for our lesson is for students to be able to express their opinions on their favourite television programmes, what does success look like? Do they need to express these opinions in writing or speaking? Do the opinions need to include certain structures? This is where success criteria come in particularly useful.
You may choose to use a structure such as WALT (we are learning to) and WILF (what I’m looking for) (Clarke, 2001). Such structures give students a really clear idea of what success will look like in that lesson and will also help you to clarify exactly what you are looking for. Additionally, we must separate what we are looking for in terms of the learning, from the tasks we are asking the students to complete (Wiliam, 2018) so that we can be clear about exactly what learning has taken place.
Only once we are clear on exactly what success will look like can we think about how we are going to get our students to actually achieve that high success rate that we are after. When presenting this to students we may well choose to show them a model answer, something we have discussed in relation to principle four.
We all know, without needing research to tell us, that when we do well at something we tend to enjoy it more and we probably want to do it more. There is, of course, much more to motivation than that, but on a basic level it’s just what we need to remember. The key here is, how do we help our students to feel successful and confident and therefore, we hope, enjoy their language learning more? Of course, the solution isn’t just to make things easier.
Helping our students to feel successful in their language learning is a difficult balance. Pitch a lesson too low and students can feel that the work is too easy, boring and pointless. Pitch it too high on the other hand and they can feel that they aren’t any good at languages, will never understand it and should just stop trying. Factor into this the fact that many of us are teaching classes with a huge range of abilities and we find ourselves with a problem. One way of increasing student motivation is to increase their linguistic self-confidence (Smith and Conti).
Clear presentation, scaffolded, structured and repeated practice, stepped progression and effective assessment and feedback will all contribute to this. These are, of course, already elements of your practice that you are already considering through the use of the other Rosenshine’s principles. Increasing our students’ linguistic self-confidence means that they will be more likely to be willing to speak the target language in class (Kiil Moberg, 2010) and therefore hopefully be able to obtain a high success rate.
Without this self-confidence, there are students that we are unlikely to hear contributions from and therefore this high success rate will only be seen in their written work. Whilst in some subjects this may be ok, language learning relies much more on those oral contributions. In order to foster this self-confidence, we need to help our students to feel successful in their language learning.
In his book, Teach Like a Champion (2010), Doug Lemov has an entire chapter dedicated to planning for success. ‘The most effective [teachers] help as many students as possible meet or exceed a high standard of excellence. To do this, they view the lesson from the student’s perspective and then systematically add supports or remove obstacles to success, without diluting rigour.’ To do this effectively we will next need to consider the importance of scaffoldingProgressively introducing students to new concepts to support their learning, which is the focus for principle eight.
In summary, if we want our students to obtain a high level of success, we need to know exactly what that success should look like and build in the appropriate supports to help them achieve this.
References
Clarke S (2001) Unlocking formative assessment. London: Hodder And Stoughton.
Kiil Molberg HK (2010) The consequence of motivation and linguistic self-confidence in relation to pupils’ oral interaction. Available at: https://munin.uit.no/bitstream/handle/10037/2951/thesis.pdf?sequence=1&isAllowed=y (accessed 16 June 2019).
Lemov D and Atkins N (2015) Teach like a champion 2.0: 62 techniques that put students on the path to college. New York: John Wiley & Sons.
Rosenshine B (2012) Principles of Instruction: Research-Based Strategies That All Teachers Should Know. American Educator 36(1): 12–19/39. Available at: https://www.aft.org/sites/default/files/periodicals/Rosenshine.pdf (accessed 12 April 2019).
Smith S and Conti G (2016). The Language Teacher Toolkit. Scotts Valley, CA: CreateSpace.
Wiliam D (2018) Embedded formative assessment. Bloomington, Indiana: Solution Tree Press.
Principle 8. Provide scaffolds for difficult tasks: The teacher provides students with temporary supports and scaffolds to assist them when they learn difficult tasks.
Rosenshine’s eighth principle encourages teachers to provide their students with scaffolds in order to learn how to complete difficult tasks. This is a principle that can be applied to any of the four core language skills (speaking, listening, reading and writing) and at all key stages. In teaching students how to tackle difficult tasks, we may encourage students to use certain cognitive strategies as supports in order to help bridge the gap between current ability and the intended learning outcome (Rosenshine and Meister, 1992).
Writing
One area in language teaching where this comes in particularly useful is preparing students to answer certain types of exam questions, especially on the writing paper. There are a variety of ways of going about this:
- Structure strips. When setting a written task using bullet points, provide students with a strip that they can stick into their books, or preprinted in their booklet, that takes them through the task step by step. Depending on the level of your students you may wish to include different types of prompts here. Here the example is written in English to ensure it can be accessed by teachers of all languages, usually it would be in the target language as per the GCSE exam. This example has been adapted from one shared by @MissNewnham on Twitter.
You are writing to your Spanish pen pal about your hometown, include:
- Where you live exactly
- What there is for tourists in your hometown
- What you did recently in your town
- What you are going to do if the weather is good this weekend.
| Where you live exactly: I live in….It is in…It is a… | Student writing space here |
| What there is for tourists: In my town you can … For tourists there is … It is a good/bad tourist destination because… | |
| What you did recently in your town: Last weekend I … It was …. Also I … | |
| What you are going to do if the weather is good this weekend: This weekend, if the weather is good… It is going to be … However, if the weather is bad… |
- Sep-by-step breakdown and checklists: Use a scaffold sheet as described below to help students work through the steps of a task, this should be set out so that there is space for students to complete each step. If students are used to doing this for every written task of this type that they practice, by the time they reach the exam they will be ready for that support to be taken away.
| Step one | Translate the bullet points of the task into English. This ensures that students have taken the time to understand exactly what they are being asked to do. |
| Step two | Change the bullet points into the first person. It is crucial that students get used to doing this as they will not gain marks for bullet points where they haven’t manipulated the language correctly. For example, if asked to talk about ‘your holidays’ and students write ‘on your holidays I like to go to Spain’ their marks will be restricted. Getting students into the habit of making these changes at the outset goes some way to helping them remember this. |
| Step three | Write down the key regular verb endings in three tenses. This step helps to reduce cognitive load for students as they have a key reference written in front of them and they won’t need to worry about recalling that knowledge later. |
| Step four | Write a LOTS (Links, Opinions, Time frames, Sequencers) list or similar, according to the acronym you teach your students. This has the same effect as step three. |
| Step five | Complete the task. |
| Step six | Check list. Ensure students have checked spellings, tenses used, justified opinions included and all bullet points covered. |
Example adapted from scaffold shared by @senorcordero on Twitter.
- Acronyms. There are many acronyms being used by language teachers for different purposes. Here is just one example for writing:
| Box the verb – does it need changing to the I form? Underline the key nouns -What exactly do you need to write about Swap and circle words for you and your – Change them to me and my Tenses and time frames – When should I be writing about? |
(Adapted from @MissEdmonston on Twitter).
BUST encourages students to think through a set of steps to prepare themselves before answering a question. As with the previous suggestion, if used frequently over the course this should become natural to students by the time they take the exam. This is a particularly important process as many students neglect to correctly conjugate verbs or change the possessives and end up losing valuable marks on the exam.
Another example of scaffolding, this time applied to translation is with writing frames/sentence builders. Many teachers are using these and there are plenty of examples available (see Smith, 2018).
A very basic example would be:
| Voy (I go) | a la piscina (to the swimming pool) a la bolera (to the bowling alley) | con mis amigos (with my friends). con mi familia (with my family). |
| al parque (to the park) |
Translate these sentences:
- I go to the park with my friends.
- I go to the swimming pool with my family.
- I go to the bowling alley with my friends.
This frame gives students the support that they need to write the sentences; they just need to make decisions about exactly what they need. To make this more challenging I would suggest removing the English, or asking students to obliterate the English when they feel confident enough to do so.
Speaking
Scaffolding is not only useful for written tasks, but also for speaking. One well-known acronym, whose origin is hard to trace due to the many variations that are now used is PALM W OJ. This acronym is designed to help students structure their response to a picture description question.
The more students practise with this in class the better, if students have practiced this sufficiently and it has become part of their routine for this task, you will often find that they have written it on their paper to help structure their response. This should be encouraged, especially as under the pressures of the exam it can really help to ease their mind and help them to prepare.
Reading and listening
Finally, reading and listening comprehension tasks can be scaffolded by using a series of warm-up activities before the main task. These activities may ask students to match up vocabulary, pair up sentences, re-order text or identify the words they are hearing. The aim is to introduce students to the language that they are going to hear in the main task, perhaps a GCSE style reading or listening question.
Some examples:


As you have seen, scaffolding in MFL can take many forms. The important part is that the steps involved helps our students to feel more confident and able to tackle the tasks that they are set. It is of course vital that we carefully consider how to remove these over time, and if that is directed by us or the students, in order to ensure that they can complete the tasks unsupported in future.
References
Edmonston (2017) @MissEdmonston. Twitter. Available at: https://twitter.com/MissEdmonston/status/1071809916388732928 (accessed 30 June 2019).
Lamb A (2013) @senorcorder. Twitter. Available at: https://twitter.com/senorcordero?lang=en (accessed 30 June 2019).
Newnham S (2017) @MissNewnham. Twitter. Available at: https://twitter.com/missnewnham?lang=en (accessed 30 June 2019).
Rosenshine B (2012) Principles of Instruction: Research-Based Strategies That All Teachers Should Know. American Educator 36(1): 12–19/39. Available at: https://www.aft.org/sites/default/files/periodicals/Rosenshine.pdf (accessed 12 April 2019).
Rosenshine B and Meister C (1992) The Use of Scaffolds for Teaching Higher-Level Cognitive Strategies. Available at: https://www.ascd.org/ASCD/pdf/journals/ed_lead/el_199204_rosenshine.pdf (accessed 30 June 2019).
Smith S (2018) Becoming an outstanding languages teacher. Abingdon: Routledge.
Principle 9. Require and monitor independent practice: Students need extensive, successful, independent practice in order for skills and knowledge to become automatic.
Rosenshine’s ninth principle is the aim that the preceding eight have been leading up to. If our students have practised at different times with varying levels of support then it is logical that we would later want them to be able to do these things independently. We have already discussed different ways of practising depending on what it is we are intending our students to learn. Now is the opportunity to discuss how this very structured and well supported practise can become independent.
This independent practice should only come when we are confident that students will be able to cope with the task set. This isn’t to say that students should perform perfectly and get every element of a task correct, but that students should not require frequent support or guidance from the teacher. This independent practice aims to have students repeat the process until it becomes automatic or fluent.
As language teachers there are a number of things that we want our students to be good at and to be able to do automatically. How we view these things will often depend on what we are preparing our students for, for example international teachers might have very different aims to those of us preparing students for GCSE exams. Examples of tasks we might want students to be able to carry out automatically:
- Prepare a description of a photo
- Orally answer questions that they haven’t been given time to prepare
- Prepare a response to a roleplay
- Write an answer to a written question of varying lengths (40, 90 or 150 words)
- Translate a text from English to the target language
- Translate a text from the target language to English
- Answer multiple choice questions on a written or spoken text
- Answer questions which require a written response about a spoken or written text.
Before this stage, students will have practiced very specific parts of these tasks many times, they will have seen worked examples of what you will expect the final outcome to be and they will know the steps involved in getting there. The aim of this final practice stage is to show that students can now complete these tasks on their own without close supervision. It is important that they are now expected to complete the whole task themselves, without the scaffolds that you would previously have put in place. So long as there has been sufficient practice beforehand then this won’t be an issue. If this is too hard then students haven’t practiced sufficiently yet and are not ready for independent practice.
Take, for example, preparing a description of a photo. In previous lessons you have made sure that students know the key vocabulary needed, you have taught them how to use the present continuous tense to describe what is happening in the photo, you have provided scaffolds for how to structure the response as well as model answers. These stages have all been tested and checked and all students understand the process. Before asking them to complete a full photo description on their own you might give students a reminder of these steps.
Students could then be given a range of pictures to describe. In future lessons, students should just need a reminder of how you expect them to tackle the task so eventually, by the time they get to the exam, they will be well-rehearsed and ready for the task. You will of course need to give them feedback on what they have produced in order to check that this practice has been successful. This feedback should match up with the stages that you have practiced and comment on how well the student has done at each of those parts as well as the task as a whole. This way you will be able to pinpoint exactly what it is that needs practice.
Shown below is an example of how you might structure this practice. This is not a full lesson sequence and there would be more content to these lessons than just the photo description work.
| Lesson one | Free time activities |
| Lesson two | Free time activities with the present continuous tense |
| Lesson three | Introduction of photo description task. Using PALM W OJ or similar. People Action Location Mood Weather Opinion Justification Modelling and practice as a class. |
| Lesson four | Starter – what does PALM W OJ stand for? One modelled example. Independent practice |
| Lesson five | Feedback and new topic |
| Later lesson | Applying PALM W OJ to a photo related to the latest topic |
The same principles can be applied to any of the other tasks mentioned above. The key is that students are repeatedly practising these tasks and receiving feedback on how successful they have been. The more these are practised across different topics the better.
In conclusion, principle nine is the checking and consolidation stage that proves that the previous steps have all done their job and allows students to put their learning into practice and grow in confidence. This final stage is where the learning transfers from being teacher-led to being in the hands of the students.
References
Rosenshine B (2012) Principles of Instruction: Research-Based Strategies That All Teachers Should Know. American Educator 36(1): 12–19/39. Available at: https://www.aft.org/sites/default/files/periodicals/Rosenshine.pdf (accessed 12 Apr. 2019).
Principle 10. Engage students in weekly and monthly review: Students need to be involved in extensive practice in order to develop well-connected and automatic knowledge.
Rosenshine’s tenth principle relates to the frequency at which we are expecting students to review their knowledge. Of course, we already know that massed practice will create short-term confidence but that it will not lead to long term learning (Dunlosky 2013), so this will need to be reviewed over time.
Spacing practice is most effective for studying for a test after a delay, making it an ideal principle to apply to our teaching when preparing students for an exam which is a long way off. As we have previously discussed in relation to more than one of Rosenshine’s principles, forgetting is really important in the learning process and helps to strengthen the memories and our ability to remember them (Weinstein, Sumeracki and Caviglioli 2019).
It is particularly important that we continue to bring previous learning to mind, not only so that students are encouraged to remember it but also so that they can apply this knowledge to a new context. Take for example learning to use the words ‘ya no’ (no longer) and ‘todavia’ (still) in Spanish. In one of the major textbooks these are taught to students in the context of sports and what they used to do in their free time. Without encouraging students to apply these structures to topics such as school, holidays, family, work etc these structures will only be associated with the original context in which they were learned. Frequent review allows us to encourage students to link these structures to their knowledge of a range of contexts.
One way of doing this might be to start the next lesson with a task that requires students to relate their knowledge of these grammatical structures to different topics as well as the one they have just been learning. You may choose to do something like the below, adapted from an example given in principle one. As well as doing this in the next lesson, you should bring it back again once more time has passed to ensure that students are practicing a range of language in different contexts, not just the modules they are currently studying.
Translate these into Spanish and add up your score.
| I still study Spanish | I no longer play tennis | My brother still reads comics |
| I no longer use Snapchat | I no longer study art | I still go swimming on Fridays |
| My best friend still likes to study music | I still watch TV every day | My sister no longer plays hockey |
Green (topic studied last term or older)= 4 points
Yellow (topic studied earlier this term)= 3 points
Blue (current topic)= 2 points
We can encourage this weekly and monthly review in different ways, either through starter activities in lessons or through homework. We could also consider how we are structuring our assessments and if we are requiring students to retrieve knowledge from modules other than the one they have just been studying.
Some ideas from a blog post by Mark Enser are:
- Taking some one-to-one time with students to look over their work from the last few weeks to discuss what they have learned and the progress they have made.
- Making use of checklists and knowledge organisers to see how each element of learning fits into the bigger picture.
- Making sure that regular lesson starter quizzes also include questions which test previous learning (HCC Ped Team, 2018).
Homework policies will vary from school to school, but where possible you could consider structuring the homework that you set so that it incorporates plenty of reviewing of previous learning. This could be through students use of tools such as Quizlet to review vocabulary and conjuguemos.com for reviewing grammar or through less technological methods such as a worksheet. Structuring this well could take some time, looking at what students have studied and when it is due to come up again but in the long term it should pay off as students will be more prepared to work with previously learned language and structures.
Importantly though, we must acknowledge that a lot of regular reviewing happens as a natural part of language learning. We don’t teach the present tense just the once and never return to it, nor do we do a one-off lesson on adjective agreement and never need it again. There are fundamental parts of language that we constantly come back to and expect students to practise time and time again over different topics. However, we do need to be aware of, and plan opportunities for purposeful review when it comes to topic-specific vocabulary that students might forget, or lesser-used structures that don’t naturally come up all the time. We could do this through starter activities such as those exemplified in principle one as well as careful planning of homework as previously mentioned.
So, to conclude this final principle, I refer back to this quote which we encountered when considering Rosenshine’s first principle:
The most important thing about this review is that it is encouraging students to think, as ‘memory is the residue of thought’ (Willingham, 2010).
It is important to consider what it is that you need students to remember in the long term and make sure that they are frequently being asked to think about exactly that, across different contexts, in different types of tasks, in both the production and comprehension of language. This is what will support them to develop that well-connected and automatic knowledge for which we are aiming.
References
Dunlosky J (2013) Strengthening the Student Toolbox: Study Strategies to Boost Learning. American Educator 37(3): 12–21. Available at: https://www.aft.org/sites/default/files/periodicals/dunlosky.pdf (accessed 12 April 2019).
HCC Ped Team (2018) Putting theory into practice. Heathfield Teach Share Blog. Available at: https://heathfieldteachshare.wordpress.com/2018/04/23/putting-theory-into-practice (accessed 7 July 2019).
Rosenshine B (2012) Principles of Instruction: Research-Based Strategies That All Teachers Should Know. American Educator 36(1): 12–19/39. Available at: https://www.aft.org/sites/default/files/periodicals/Rosenshine.pdf (accessed 12 April 2019).
Weinstein Y, Sumeracki M and Caviglioli O (2019) Understanding how we learn: a visual guide. Abingdon: Routledge.
Willingham D T (2010) Why don’t students like school? : a cognitive scientist answers questions about how the mind works and what it means for the classroom. San Francisco, Ca: Jossey-Bass.
View the Principles of Instruction research paper
Return to the Principles of Instruction collection


The image under Principle 3 is missing. It leads to google drive but as readers, we are denied access. Is there a way to make it available asap please?
Sorry about that, it has now been updated.
Hello. Under the section “Principle Eight”, towards the end of that section, just above the “references”, there are three images below the sub-title “some examples”. None of those images are displaying. I have opened the article in three different browsers (Safari, Chrome & Firefox) and they do not display in any of those browsers. Are you able to fix it?
Hi Tom, thanks for pointing this out. You should now be able to see the images of the three examples.
Hi, when was this article written? I’d like to reference it in a university assignment I’m doing. Thanks
Hi Niamh. This article was published in December 2020.